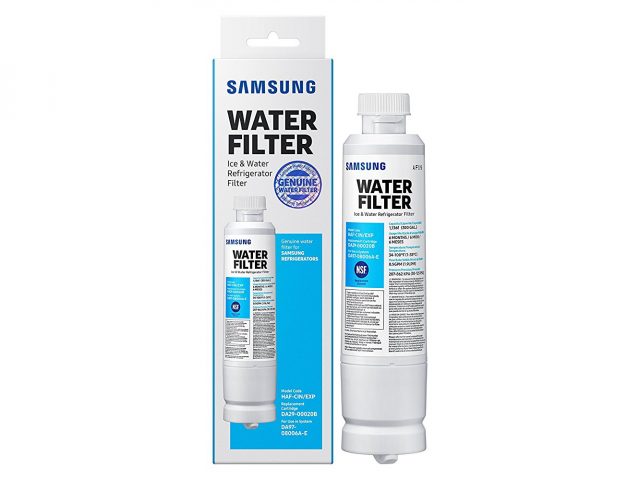
Water filters are an essential component of a refrigerator. The importance of water filters in any refrigeration system cannot be ignored. They help in removing chemical tastes and odors thus making the water not only fresh but also better tasting. This is perhaps why many people currently prioritize refrigerators with inbuilt filters. Actually, to many people, water filters are a prerequisite when buying refrigerators.
Why use water filters?
As mentioned, water filters are a good option if you need clean and healthy drinking water. Water is filtered as it gets to the refrigerator thus comes out clean and chilled. Besides, refrigerator water filters make ice from filtered water. Note that ice made from unfiltered water is equally contaminated. This may result in waterborne diseases and other health problems associated with toxic chemicals.
That said, the importance of having a filer cannot be ignored. With its carefully designed craftsmanship, installing one benefits your family health-wise. Better quality, better taste, convenience, lower cost and less waste can be brought along by installing a water filter. Some of the popular water filters present in the market include:
- Whirlpool filters
- KitchenAid
- Hotpoint
- Maytag
- Jenn-air
- Frigidaire
- Amana

How to install a water filter
Installing a water filter isn’t a daunting task. To begin, ensure that you have the necessary tools for the project. Some key tools include:
- A bucket
- Tube cutter
- Slip joint pliers
- File
- Rags
- Adjustable wrench
- 4 in 1 screwdriver
- A pipe strap
- One ¼” screws
- An inline water filter
Steps to follow
Cut the main supply line – before cutting the supply line, begin by turning off the shut off valve. This disconnects the water supply. Mark the width of the filter in the supply line to cut out. It is prudent to leave at least 6” space clearance between the refrigerator and the wall. Proceed by cutting the pipe using the pipe cutter gently. Deburr the cut side using a file or sandpaper for a soft finish.
Add the fittings – a brass nut and ferrule are the common fittings used. Slip the ferrule and brass nuts onto the tubing. Ensure that you twist them until they are finger tight to prevent leakages. Note that longer fittings should go to the supply side.
Fix the filter – begin by snapping the filter in the supply side. All filters have water flow indicators. Ensure that the indicator points towards the fridge. Support the filter and open the shutoff valve slowly. Use the bucket to fetch water flowing from the filter for approximately five minutes before snapping it to the other fitting end. Tighten the nuts and fittings to prevent leakages. Remember to note the installation date on the filter for future references.
With continuous use, water filters need to be changed. You should consider replacing your filter:
- After every six months for regular use. This is why noting the installation date is important.
- After three months if it was heavily used.
- If there are changes in odors or development of bad water taste
- If water presents with discolored or has particles.
Replacing a refrigerator water filter is an easy activity that can be done at home personally. However, if you aren’t sure about this procedure, consider employing the services of experts. Nonetheless, the key refrigerator water filter replacement steps include the following.
How to Replace Refrigerator Water Filters
Begin by collecting the necessary materials that will be used in the replacement project. The essential items include:
- A wrench
- Felt tipped pen or a marker
- Towel
- A masking tape

Replace the filter by following the following steps:
Try locating the position of your refrigerator’s water filter – for most models, the filter is located in the refrigerator grille or the base of your fridge. Other models position the filter on the back-upper right corner. Nonetheless, look for a knob or button that releases the filter when pressed.
Remove the old filter – there are two common ways of removing the old, worn-out filters. However, this depends on the type of fridge. Quarter turn cap model fridge filters can be removed by turning the filter knob counterclockwise. Use a wrench for this. Once the cap is in a vertical position, pull it to remove the filter. Keep the cap in a safe place as you will reuse it with the new filter. For push-button filter cap, you’ll need to push the button beside the cap as you pull the filter to remove it. Note that the filter may drip some water after removal. Therefore, always hold it in an upright position and lay it on a towel to absorb any water dripping out.
Unpackage the new water filter – remove the new filter and replace the cartridge cap. For quarter-turn filter caps, simply slide it over the new filter whereas for push button cap, align the cap with the filter and twist the cap till it clicks into its place.
Replace the filter and cap – once the filter and caps are in fixed, slide them into the filter hole. Avoid over-tightening the water filter. Ensure that they are rightfully in place by listening for a click sound. Once it is in place, the eject button will pop up.
Clean – this can be done by running at most two gallons of water through the new system. Cleaning helps in clearing any impurities that might have been left during manufacturer.
Label – label the filter by placing a small masking tape outside the filter. Write the replacement date. However, you can omit this step if your refrigerator has indicator lights or the filter has a self-adhesive label. For a fridge that has indicator lights, remember to reset the lights. Follow the manufacturers manual for this procedure.
The Bottom Line
From the steps outlined above, installing and replacing a water filter isn’t much challenging. Follow the right directions to achieve healthy and clean drinking water. Some of the common installation mistakes to avoid include:
- Dispense at least 2 or 3 gallons of water to flush the new filter
- Reset the indicator light as per manufacturer’s directions
- Remove any protective caps before installing the new filter
- Do not dispose off the reusable knob
As you plan on undertaking any of these procedures, consider finding a good quality filter that will serve with utmost effectiveness.